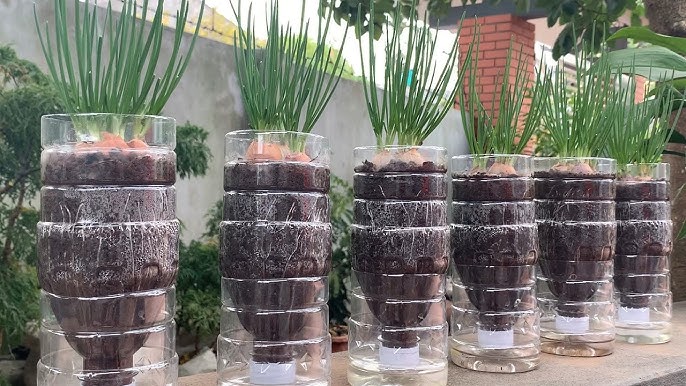
Onions are a kitchen staple worldwide, and growing them at home can save money while providing fresh, flavorful produce. But traditional onion farming often requires garden space, frequent watering, and careful soil management. What if you could grow onions at home in plastic bottles using a self-watering system? This method is perfect for balconies, small patios, or even indoor spaces, and it allows anyone to enjoy fresh, healthy onions without a full-scale garden.
In this comprehensive guide, we’ll walk you through every step of growing onions in plastic bottles, from selecting the right onion variety to harvesting and maintaining your plants.
1. Why Grow Onions in Plastic Bottles?
Plastic bottle cultivation is increasingly popular among urban gardeners because it is:
- Space-saving: Vertical or small-scale setups work for balconies and windowsills.
- Water-efficient: Self-watering reduces the need for constant attention.
- Eco-friendly: Reuses plastic bottles, reducing waste.
- Cost-effective: You don’t need expensive pots or soil beds.
- Clean and manageable: Minimal soil spillage and easy to move around.
Using this method, even beginners can achieve high yields of healthy onions.

2. Choosing the Right Onion Variety
Not all onions perform equally well in containers. For bottle cultivation, choose small to medium-sized varieties:
- Red onions – Mild and flavorful, ideal for salads.
- White onions – Slightly pungent, versatile in cooking.
- Green onions (spring onions) – Fast-growing, perfect for continuous harvest.
- Shallots – Compact bulbs suitable for vertical growing.
For beginners, green onions are highly recommended because they grow quickly and are less sensitive to space constraints.
3. Preparing Plastic Bottles for Onion Growing
Plastic bottles can easily be transformed into self-watering containers. Here’s how:
Materials Needed
- 1–2 liter plastic bottles
- Sharp scissors or craft knife
- String, cotton wick, or rope (for self-watering)
- Small pebbles or stones for drainage
- Soil or growing medium
Step-by-Step Bottle Preparation
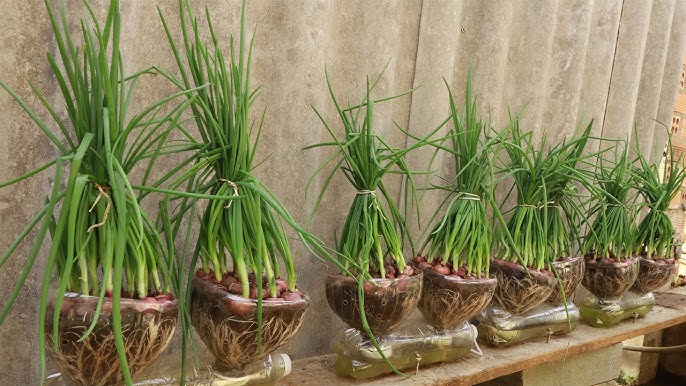
- Cut the Bottle: Cut horizontally about one-third from the top. The bottom part will hold water, the top part will hold soil.
- Make Drainage Holes: Poke small holes in the bottom of the upper section for water absorption.
- Add a Wick: Thread a cotton string through the holes, ensuring it touches water in the lower bottle section. This wick will draw water upward, keeping soil moist.
- Layer Pebbles: Place small stones at the bottom to improve drainage.
- Fill with Soil: Use light, nutrient-rich soil such as a mix of compost and coco peat or potting mix.
Your self-watering plastic bottle is now ready to support onion growth.

4. Planting Onion Seeds or Sets
Onions can be grown from seeds, bulbs, or sets.
Planting from Seeds
- Soak seeds overnight for faster germination.
- Plant seeds 0.5–1 cm deep in moist soil.
- Space seeds 2–3 cm apart in each bottle.
Planting from Bulbs or Sets
- Choose healthy onion sets free of rot or damage.
- Place sets 1–2 cm deep in soil, ensuring the pointed end faces upward.
- Cover lightly with soil.
For faster results, beginners often prefer onion sets, which germinate more quickly than seeds.
5. Positioning Your Bottles
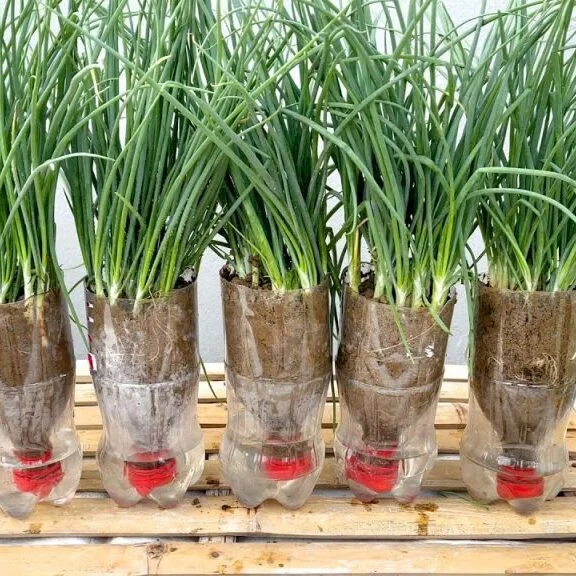
- Place bottles in full or partial sunlight (4–6 hours/day).
- Ensure good airflow to prevent fungal issues.
- Vertical setups can save space by stacking bottles or hanging them from railings.
Proper light exposure is essential for healthy green growth and bulb development.
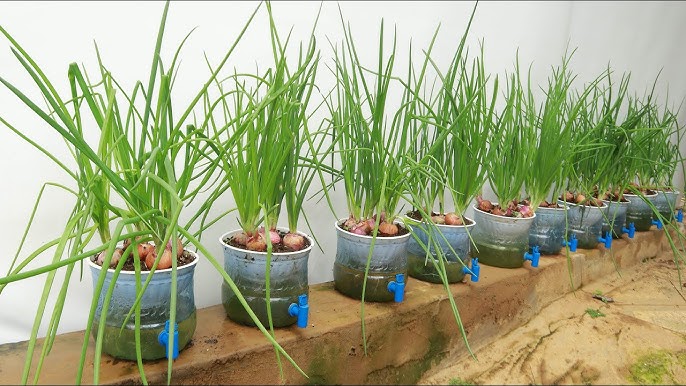
6. Watering and Self-Watering System
The self-watering system makes onion cultivation easy:
- Fill the bottom container with water; the wick will draw moisture into the soil gradually.
- Refill the water reservoir every 5–7 days depending on climate.
- Avoid overwatering; onions prefer moderately moist soil, not soggy conditions.
- Check soil moisture periodically—soil should feel damp, not dry or muddy.
This method ensures consistent hydration, which is key to strong, healthy onions.
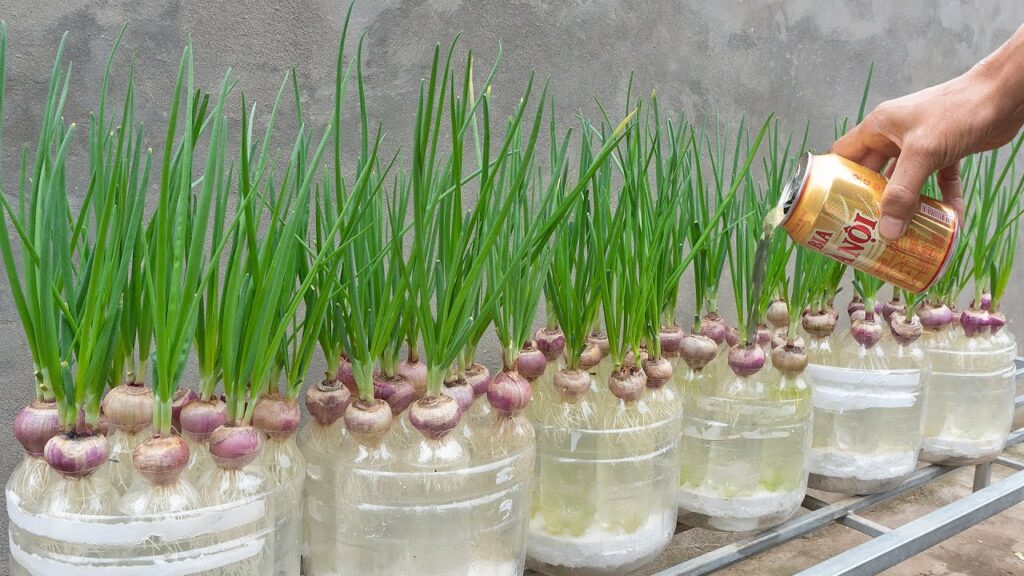
7. Fertilizing Onions in Bottles
Onions require nutrients to develop well, especially in containers with limited soil.
Recommended Fertilizers
- Balanced NPK (10:10:10) for general growth
- Organic compost or liquid manure for continuous nutrient supply
- Potassium-rich fertilizer during bulb formation to enhance size and sweetness
Fertilizing Tips
- Fertilize every 2–3 weeks in small doses.
- Over-fertilization may lead to excess green growth without bulb development.
- For organic gardeners, compost tea or diluted fish emulsion works well.
8. Mulching and Weed Control
- Place a thin layer of dry leaves, straw, or coco peat on the soil surface.
- Mulching helps retain moisture, reduce weeds, and regulate soil temperature.
- Remove any competing weeds promptly to prevent stunted growth.
Even in bottles, small weeds can compete for nutrients and space.
9. Pests and Disease Management
Common issues include:
- Aphids – Spray with mild soapy water.
- Onion flies or thrips – Use yellow sticky traps or neem oil.
- Fungal infections – Ensure good airflow and avoid waterlogging.
Early detection and natural treatments keep your onions healthy without chemicals.
10. Harvesting Onions
Onions can be harvested in stages:
Green Onions
- Harvest when the shoots are 15–20 cm tall.
- Cut stems close to the soil; new shoots will regrow.
- Allows continuous harvest from the same plant.
Bulb Onions
- Wait until leaves turn yellow and start to bend over.
- Gently pull bulbs from the soil and let them cure in a dry, ventilated area for 1–2 weeks.
- Once dried, store in a cool, dry place for several months.
Harvesting at the right time ensures sweet, firm, and long-lasting onions.
11. Tips for Maximizing Yield in Bottles
- Use larger bottles for bigger bulbs.
- Ensure adequate sunlight for at least 4–6 hours per day.
- Keep soil well-drained but moist using the self-watering system.
- Rotate bottles or switch positions occasionally to maintain uniform light exposure.
- Plant succession crops every 2–3 weeks to enjoy onions year-round.
12. Advantages of Growing Onions in Plastic Bottles
- Urban-friendly – Ideal for small spaces, balconies, and terraces.
- Low maintenance – Self-watering reduces effort.
- Eco-conscious – Recycles plastic bottles and reduces waste.
- Cost-effective – Minimal setup costs.
- Year-round harvest – Continuous growth with succession planting.
Plastic bottle cultivation is a practical solution for anyone wanting fresh, homegrown onions without a garden.
Final Thoughts
Growing onions in plastic bottles using a self-watering system is easy, sustainable, and highly productive. With proper setup, sunlight, nutrients, and care, you can enjoy fresh green onions, spring onions, or full-sized bulb onions right from your balcony or windowsill.
This method combines modern urban gardening techniques with eco-friendly practices, making it perfect for small-space gardeners. By following this step-by-step guide, anyone can turn simple plastic bottles into a thriving onion farm at home, ensuring healthy, flavorful, and fresh produce all year round.