Growing green bean sprouts at home is one of the simplest and most rewarding kitchen-gardening activities you can do. You don’t need soil, sunlight, or a garden—just a handful of mung beans, clean water, and a container. In just a few days, you can enjoy fresh, crunchy, chemical-free sprouts that taste far better than anything store-bought.
Whether you want them for salads, stir-fries, soups, or healthy snacking, bean sprouts are nutritious, inexpensive, and incredibly easy to grow. This guide walks you through the entire process step-by-step—just like many home gardeners who successfully grow crisp green sprouts all year round.
Let’s explore how you can grow your own fresh bean sprouts right in your kitchen.
1. Why Grow Green Bean Sprouts at Home?
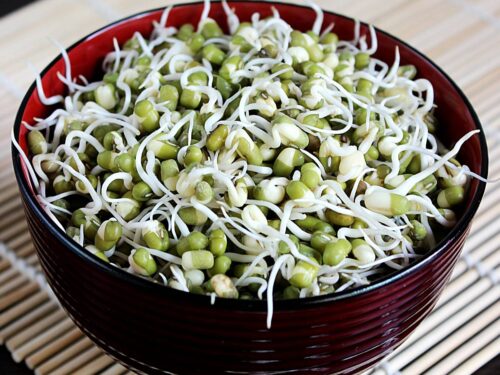
Bean sprouts are young mung bean shoots packed with nutrients. They grow fast and require no special equipment, making them ideal for beginners and experts alike.
Benefits of Homegrown Bean Sprouts
- Chemical-free: Store-bought sprouts often contain preservatives or pesticides. Homegrown ones are pure and safe.
- Fast results: Ready to eat in just 3–5 days.
- Low cost: A small cup of mung beans produces a large bowl of sprouts.
- Nutritious: Rich in vitamins A, B, C, and E, protein, fiber, folate, and antioxidants.
- Freshness: You control the environment, ensuring crisp, clean sprouts every time.
Growing sprouts also adds a fun, healthy habit to your daily routine.
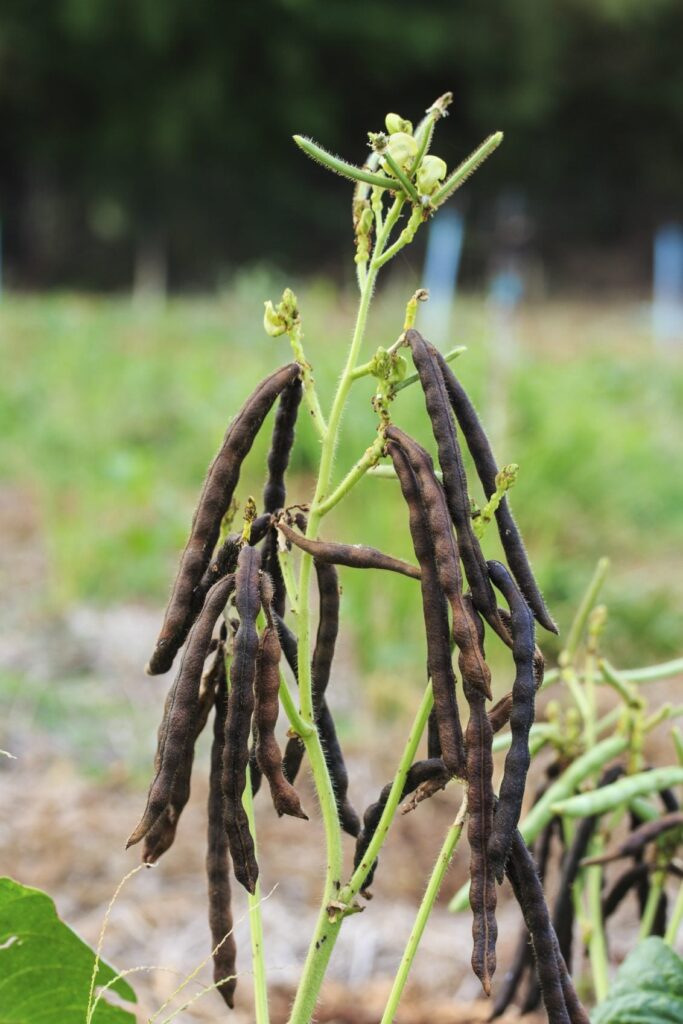
2. Choosing the Best Beans for Sprouting
The secret to perfect sprouts begins with selecting high-quality mung beans.
What to Look For
- Whole beans (not split)
- Green, clean, and unbroken
- No chemical smell
- Organic or sprouting-grade beans offer the best results
Avoid old beans—they germinate slowly and produce weak sprouts.
3. Preparing Your Beans: The First Step to Success
Step 1: Rinse Thoroughly
Place your mung beans in a bowl and rinse several times to remove dust or debris.

Step 2: Soak Overnight
Add plenty of fresh water and soak for 8–12 hours.
The beans will swell as they absorb water, kickstarting the germination process.
Step 3: Drain Completely
After soaking, drain the water using a sieve or strainer.
Your beans are now ready for sprouting.
4. Setting Up Your Sprouting Container
You don’t need expensive sprouting equipment. You can use:
- A glass jar
- A plastic tub
- A stainless-steel bowl
- A bamboo basket
- A colander
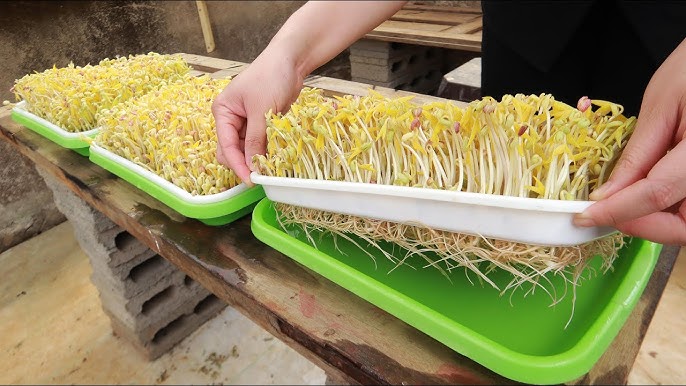
- A sprouting tray
Important Requirements
- Good air circulation
- Ability to drain water easily
- Dark or semi-dark environment
Darkness prevents bitter-tasting sprouts and promotes longer, juicier shoots.
5. Sprouting Methods: Choose the One You Like
Here are the three best ways to grow green bean sprouts at home.
Method 1: Jar Sprouting (Most Popular)
- Place soaked beans in a wide-mouthed jar—fill only ¼ of the jar.
- Cover the jar with a breathable cloth or mesh.
- Secure with a rubber band or jar ring.
- Keep the jar tilted to allow excess water to drain.
- Store it in a dark cabinet or corner.
Method 2: Cloth or Towel Method (For Thick Sprouts)
- Spread soaked beans on a clean cotton cloth.
- Tie loosely into a bundle.
- Sprinkle water on the cloth twice a day.
- Store in a dark place.
This method produces short, thick sprouts ideal for cooking.
Method 3: Colander or Sieve Method (Best Airflow)
- Pour soaked beans into a colander.
- Rinse and drain twice daily.
- Cover with a plate or cloth to keep it dark.
This method prevents rotting and gives clean, healthy sprouts.
6. Daily Sprout Care: Watering and Draining
Sprouts grow best when moisture and airflow are balanced.

Rinse Twice a Day
- Morning
- Evening
Pour fresh water over the beans, swirl gently, and drain thoroughly.
Important: Stagnant water leads to foul smell and mold.
Keep Them in the Dark
Light can turn sprouts green and bitter.
Store them in:
- A cupboard
- A dark corner
- A covered container
Temperature
Ideal temperature is 20–28°C.
Too cold slows growth; too hot encourages spoilage.
7. What to Expect Each Day
Day 1
Beans swell and may begin cracking. Small root tips appear.
Day 2
Roots grow longer. Sprouts look short but healthy.
Day 3
Sprouts thicken and lengthen. Perfect time to eat if you prefer short sprouts.
Day 4–5
Sprouts become long, crisp, and juicy—ideal for stir-fries.

If you want very thick, white sprouts like in Asian cooking, keep them tightly packed and in complete darkness.
8. How to Harvest Your Sprouts
Once sprouts reach your desired length:
- Give a final rinse.
- Remove bean skins (optional).
- Drain thoroughly.
- Use immediately or store.
Removing Bean Skins
Fill a bowl with water, add sprouts, and swirl.
The skins float and can be removed easily.
This step is optional but makes sprouts look fresher and cleaner.
9. Storing Fresh Bean Sprouts
Sprouts stay fresh for 3–4 days when stored properly.
Storage Tips
- Keep in an airtight container.
- Line the container with paper towels to absorb moisture.
- Refrigerate immediately after harvesting.
Avoid storing wet sprouts—excess moisture reduces shelf life.
10. Delicious Ways to Use Your Homegrown Bean Sprouts
Your sprouts are now ready to enjoy! Here are popular ways to use them:
- Fresh salads
- Stir-fried dishes
- Spring rolls
- Soups and broths
- Sandwiches and wraps
- Rice noodles and pad thai
- Kimchi or pickles
- Healthy smoothies
Their crunch and mild flavor go well with almost any dish.

11. Troubleshooting Common Sprouting Problems
Beans smell bad
Cause: Stagnant water
Fix: Rinse more often and ensure proper drainage.
Sprouts turn yellow
Cause: Too much light
Fix: Keep in a dark place.
Thin and weak sprouts
Cause: Overcrowding or insufficient water
Fix: Reduce bean quantity and rinse well.
Mold on sprouts
Cause: Poor airflow
Fix: Use a better-draining container and avoid air-tight conditions.
12. Tips for Thick, Crunchy Sprouts Like the Market Ones

If you prefer thick, juicy sprouts:
- Keep beans in total darkness
- Apply light weight on top (a plate or lid)
- Rinse 2–3 times daily
- Use enough beans so they grow tightly packed
- Avoid sunlight at all stages
These methods encourage the sprouts to grow thicker instead of longer.
13. Why Homegrown Sprouts Are Healthier
Store-bought sprouts often undergo:
- Chemical bleaching
- Artificial whitening
- Additives for longer shelf life
- Excessive handling and transportation
At home, you control:
- Water purity
- Hygiene
- Growth environment
- Harvest time
This makes your sprouts fresher, safer, and far more nutritious.
14. Final Thoughts: Fresh Sprouts Anytime You Want
Growing green bean sprouts at home is incredibly simple, cost-effective, and satisfying. With no soil, no heat, and no sunlight required, anyone can grow them—children, beginners, or busy adults.
In just a few days, your kitchen can turn into a tiny sprout farm producing crisp, healthy, delicious sprouts that elevate your meals and boost your nutrition.
Start with one handful of mung beans today, and you’ll never go back to store-bought sprouts again!
продвижение молодых сайтов [url=http://prodvizhenie-molodyh-sajtov.ru/]продвижение молодых сайтов http://prodvizhenie-molodyh-sajtov.ru/%5B/url%5D .
Your comment is awaiting moderation.