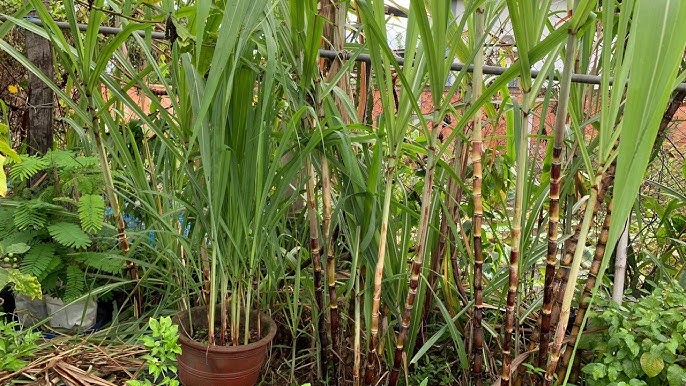
Sugarcane is one of the sweetest and most rewarding plants to grow — yet most people believe it requires large farmland, tropical fields, and huge space. The truth is surprising: you can successfully grow sugarcane right at home, even in containers, and enjoy fresh, juicy cane without needing a garden!
This detailed guide (Part 1 & Part 2 combined) will walk you through every step, from selecting the right cane pieces to maintaining healthy growth, solving common problems, and harvesting. Whether you’re a beginner or a home gardener looking to try something new, this method is simple, effective, and perfect for balconies, terraces, rooftops, and even small backyards.
Let’s learn how to grow sugarcane at home — the smart, container-friendly way!
PART 1: PLANTING & EARLY GROWTH
Why Sugar Cane Can Be Grown Easily in Containers

Sugarcane is a hardy grass that adapts well to controlled environments. Growing it in containers offers several advantages:
✔ You don’t need farmland
Even a 20–40 liter container can support a healthy sugarcane plant.
✔ Controlled soil environment
You can avoid pests, fungal diseases, and poor soil quality.
✔ Easy maintenance
Watering, fertilizing, and pruning become simpler.
✔ Fast growth
With the right care, sugarcane grows rapidly and vigorously.
✔ Eco-friendly
You can reuse buckets, drums, or grow bags.

Step 1: Choose the Right Sugarcane Stalk
Healthy sugarcane selection is the foundation of success.
Characteristics of a Good Seed Cane (“Setts”):
- Fresh and juicy
- Hard, not dry or shriveled
- Green or yellowish, depending on variety
- Contains 3–4 nodes (eyes/buds)
Avoid:
- Dry, cracked, or moldy stalks
- Cane without visible buds
- Too young or too old cane
Tip: Store-bought cane works perfectly as long as it has eyes/buds.
Step 2: Cut and Prepare the Cane Setts

Prepare 6–8 inch long pieces.
How to prepare:
- Each piece should have at least 2–3 active buds.
- Cut using a clean, sharp knife.
- Let the pieces dry for 12–24 hours to prevent fungal infections.
Optional:
Dip the cut ends in fungicide or wood ash.
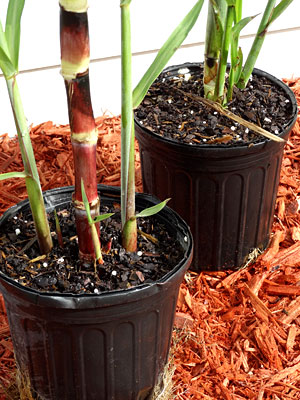
Step 3: Select the Best Container
Sugarcane grows tall and develops deep roots.
Ideal Containers:
- 30–40 liter drum
- 18–24 inch pot
- Grow bags (30×30 cm or larger)
- Recycled paint buckets
- Plastic or cement tubs
Drainage is Important
Make 8–10 holes at the bottom to prevent root rot.
Step 4: Prepare a Rich and Loose Soil Mix
Sugarcane grows best in a nutrient-rich, slightly moist soil.
Perfect Sugarcane Soil Mix:
- 40% garden soil
- 30% compost or cow dung
- 20% cocopeat
- 10% river sand
Add:

- A handful of neem cake (controls pests)
- A handful of bone meal (improves root growth)
Mix thoroughly before planting.
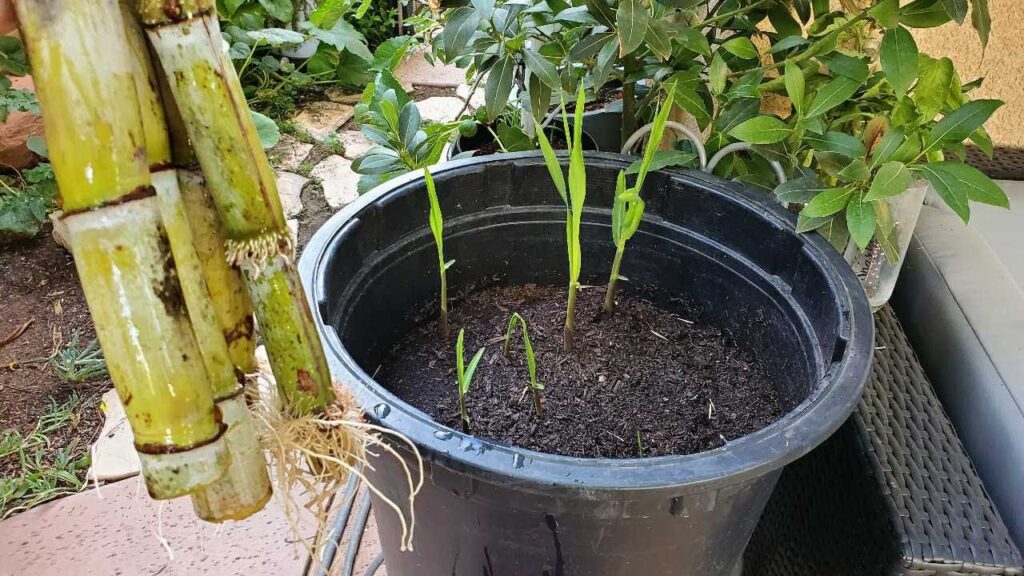
Step 5: Plant the Cane Pieces
There are two methods:
Method 1: Horizontal Planting (Best for more shoots)
- Lay the sett horizontally.
- Cover with 2–3 cm of soil.
- Water lightly.
Method 2: Vertical Planting (Best for small containers)
- Insert the cutting midway into the soil.
- Keep at least 1–2 buds above the soil.
Both methods work well — choose based on your container size.
Step 6: Watering at the Early Stage
Sugarcane needs regular moisture but not waterlogging.
Watering Rules:
- First 2 weeks: Light watering every 2–3 days
- After shoots appear: Water deeply once every 3–4 days
- In hot climate: Increase watering slightly
Avoid soaking the soil — sugarcane loves moisture, not flooding.
Step 7: Provide Proper Sunlight
Sugarcane loves heat and sunlight.
Sun Requirement:
6–8 hours of direct sunlight daily
Place containers on:
- Rooftops
- South-facing balconies
- Open terraces
Lack of sunlight causes slow growth and thin canes.

PART 2: CARE, MAINTENANCE & HARVESTING
Step 8: Fertilizing for Strong Growth
Sugarcane is a heavy feeder. Proper nutrition results in:
- Thicker stalks
- Sweeter juice
- Faster growth
- More shoots
Fertilizer Schedule:
Every 20–25 days, apply one of the following:
- Vermicompost
- Cow dung compost
- Mustard cake fertilizer (soaked & diluted)
- Banana peel fertilizer
- Seaweed liquid fertilizer
- NPK 19:19:19 (optional, very diluted)
Add a handful of wood ash monthly for natural potassium.
Important:
Avoid too much nitrogen or the plant will grow tall but thin.
Step 9: Weed and Shoot Management
Sugarcane produces multiple shoots. More shoots mean thinner canes, so thinning is necessary.
At 2 months:
- Keep the 2–3 strongest shoots.
- Remove the weak ones.
This ensures thick, healthy cane development.
Step 10: Mulching — The Secret to Sweet Cane
Mulching helps retain moisture and increase sugar content.
Best Mulch Materials:
- Sugarcane leaves
- Dry grass
- Straw
- Coco chips
Spread 3–4 cm of mulch around the base.
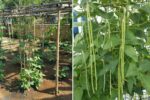
Step 11: Support the Plant
Sugarcane grows tall, often 6–10 feet in containers.

Use:
- Bamboo stakes
- Poles
- Ties
- Garden sticks
Tie loosely to prevent damage.
Step 12: Pest & Disease Control
Common issues:
1. Ants & Aphids
Solution: Spray neem oil every 15 days.
2. Fungal infection on base
Solution: Keep soil airy, avoid overwatering.
3. Yellowing leaves
Solution: Add compost + a pinch of Epsom salt (magnesium).
Sugarcane is hardy, so pest issues are usually minimal.
Step 13: Maturity and Harvest Time
Sugarcane takes 8–12 months to mature, depending on climate and variety.
Signs of Maturity:
- Leaves at the bottom turn dry
- Cane becomes thick & heavy
- Color becomes brighter
- Joint nodes become more visible
- When pressed, the cane feels hard, not soft
How to Harvest:
- Cut the cane at the soil level.
- Remove outer leaves.
- Clean and enjoy the juice or chew the pieces.
Container-grown cane is surprisingly sweet because the plant receives consistent nutrients.
Bonus Tip: REGROW Sugar Cane Without Replanting
After harvest, do not remove the roots.
Sugarcane regrows naturally from the base and can give:
- 2nd crop
- 3rd crop (sometimes)
Just apply compost and keep watering — it will sprout again!
Conclusion: Anyone Can Grow Sugarcane at Home!
Growing sugarcane in containers is not only possible — it’s incredibly rewarding, fun, and surprisingly easy. With the right cane pieces, a large container, good soil, sunlight, and regular feeding, you can harvest fresh, juicy sugarcane right on your balcony or terrace.
This complete Part 1 & Part 2 guide covered:
Selecting cane
Preparing containers
Soil mix
Watering
Sunlight
Care and fertilizing
Harvesting
Regrowth tips
Even beginners will succeed using this method because sugarcane is strong, resilient, and grows fast — perfect for home gardeners.
Start with one container today, and within a few months, you’ll be amazed at how tall and beautiful your sugarcane grows!