Green chillies are not only a staple in kitchens around the world, but they’re also incredibly rewarding to grow at home. Whether you’re a gardening enthusiast, a balcony farmer, or someone who loves fresh and organic produce, growing your own green chillies ensures you always have a supply of fresh, flavorful, and fiery chillies ready to spice up your meals.
This comprehensive 1200-word guide covers everything you need to know about planting, nurturing, and harvesting green chillies at home, from seeds to a bountiful harvest.
Introduction: Why Grow Green Chillies at Home?
Green chillies are rich in vitamins, antioxidants, and capsaicin, which have health benefits like boosting metabolism and immunity. Growing them at home has many advantages:
- Freshness and flavor: Home-grown chillies are far superior in taste to store-bought ones.
- Chemical-free: Avoid harmful pesticides.
- Cost-effective: Growing your own reduces grocery bills.
- Continuous supply: With proper care, plants can yield chillies for months.
- Compact growth: Perfect for small spaces, pots, or balcony gardens.
Step 1: Choosing the Right Green Chilli Variety
The first step in chili planting is selecting the variety that suits your taste and growing conditions. Some popular types include:
- Cayenne: Long, thin, and very spicy.
- Jalapeno: Medium heat, good for cooking and pickling.
- Bird’s Eye: Tiny but extremely hot.
- Bell or Sweet Chilli: Mild, ideal for salads and garnishes.
Choose a variety based on your preference for heat level, size, and culinary use.

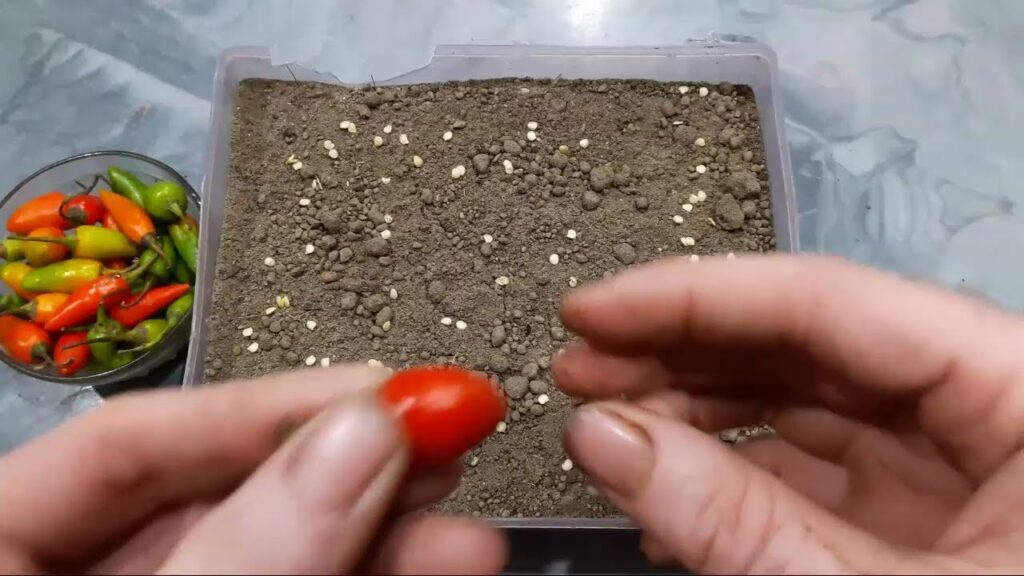
Step 2: Preparing Seeds for Germination
Starting chillies from seeds ensures a continuous supply of plants.
How to germinate:
- Soak seeds in warm water for 6–12 hours to soften the seed coat.
- Plant seeds in seed trays, small pots, or germination trays filled with a light, well-draining mix. A mix of cocopeat, compost, and garden soil works well.
- Keep the medium moist but not waterlogged.
- Maintain warm temperatures (25°C–30°C) for faster germination.
- Seeds sprout within 7–14 days depending on variety.
Step 3: Preparing Containers and Soil
Green chillies can be grown in pots, containers, raised beds, or directly in the garden. Container gardening is ideal for urban homes.
Container tips:
- Minimum depth: 12–15 inches for root growth
- Minimum width: 10–12 inches per plant
- Ensure drainage holes at the bottom
Soil mix for chillies:
- 40% garden soil
- 30% compost or well-rotted manure
- 20% cocopeat or sand
- 10% vermicompost
Optional: Add bone meal or neem cake for better root growth and pest resistance.
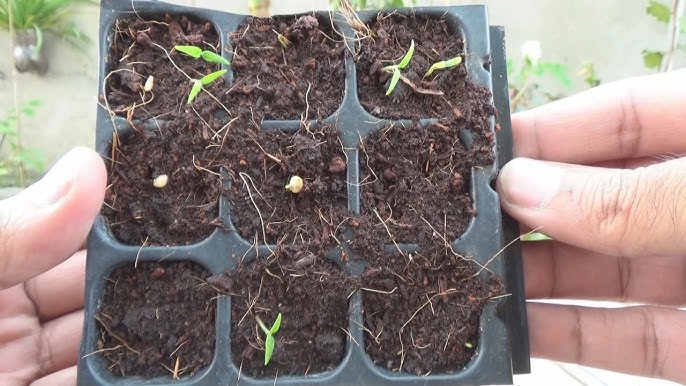
Step 4: Transplanting Seedlings
Once seedlings have 4–6 true leaves and are 6–8 inches tall, they are ready for transplanting.
How to transplant:
- Water seedlings before removing them.
- Make a hole in the container or bed slightly larger than the seedling root ball.
- Plant carefully, keeping the stem upright.
- Water immediately to help the plant settle.
Spacing: Keep 12–18 inches between plants for proper air circulation and growth.

Step 5: Light and Temperature Requirements
Green chillies are sun-loving plants and thrive in warm conditions:
- Sunlight: Minimum 6–8 hours per day
- Temperature: 20°C–35°C ideal
- Avoid cold drafts or frost, as chillies are sensitive to low temperatures.
Indoor gardening tip: Use grow lights if sunlight is limited.
Step 6: Watering Your Chilli Plants
Chillies need consistent moisture, but overwatering can lead to root rot.
Watering tips:
- Water when the top 1–2 inches of soil is dry
- Deep watering ensures strong root development
- Reduce watering slightly during flowering to encourage fruiting
- Mulch the soil with straw or leaves to retain moisture and reduce weeds
Step 7: Fertilization and Nutrient Management
To produce healthy foliage and abundant fruits, chillies need regular feeding.
Recommended schedule:
- At planting: Mix compost and vermicompost into the soil
- Every 2–3 weeks: Apply a balanced NPK fertilizer
- During flowering: Increase potassium and phosphorus to support fruiting
- Optional: Use organic alternatives like fish emulsion, neem cake solution, or banana peel liquid
Tip: Avoid excessive nitrogen—it promotes leaf growth but reduces fruiting.
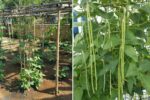
Step 8: Supporting and Pruning Chilli Plants
Chilli plants can become top-heavy as fruits grow.
Tips for support:
- Use small bamboo stakes or sticks to support stems
- Prune lower leaves and dead branches to improve airflow
- Remove damaged or yellow leaves to prevent pests and diseases
Proper support and pruning help increase yield and fruit quality.
Step 9: Pest and Disease Management
Green chillies can attract pests like:
- Aphids
- Whiteflies
- Spider mites
- Leaf miners
Natural control measures:
- Neem oil spray every 7–10 days
- Garlic-chili spray for pest deterrence
- Soap water for aphids
- Remove affected leaves immediately
Preventive care: Keep plants spaced well and soil clean to reduce fungal problems.
Step 10: Flowering and Fruit Set
Flowering is a crucial stage:
- Chillies begin flowering 6–8 weeks after transplanting
- Flowers appear in clusters at leaf axils
- Ensure adequate sunlight, water, and nutrients
- For better pollination, gently shake flowers or use a soft brush
Hermaphrodite varieties self-pollinate, but hand-pollination can increase yield in others.
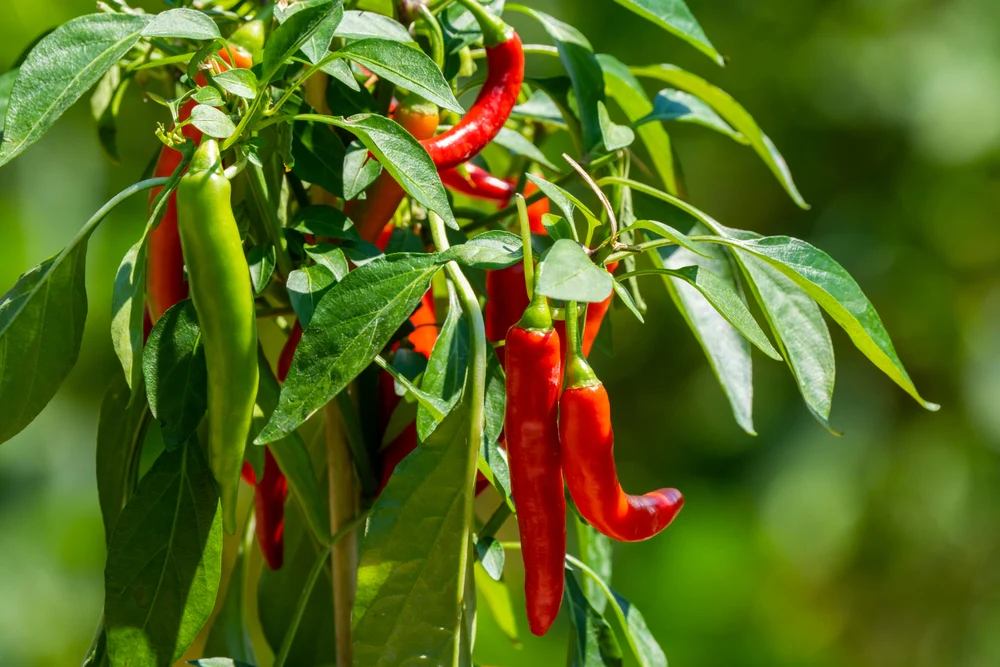
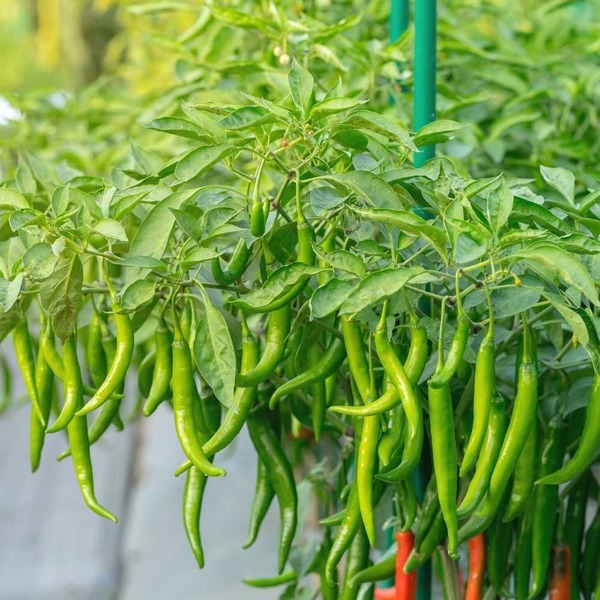
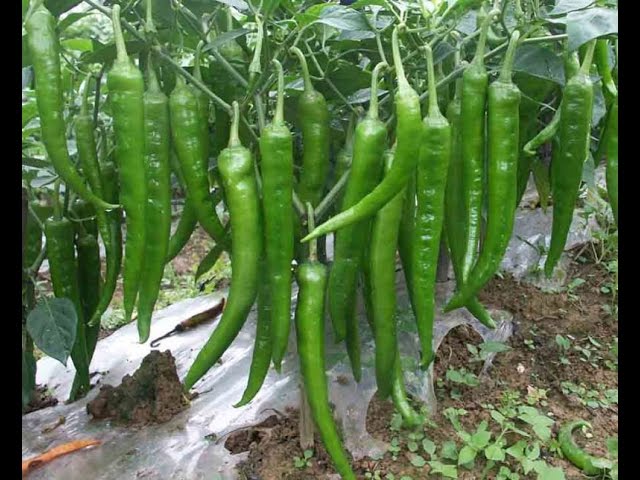
Step 11: Harvesting Green Chillies
Chillies can be harvested 30–50 days after flowering, depending on variety.
How to harvest:
- Pick chillies when they are firm, glossy, and fully green
- Use scissors or garden shears to avoid damaging the plant
- For continuous harvest, pick mature fruits regularly
Tip: Leaving some fruits to ripen red increases flavor and allows seeds to mature.
Step 12: Continuous Care and Second Harvest
Chilli plants can produce fruits for several months with proper care.
- Continue feeding, watering, and pruning
- Remove old leaves
- Keep plants free from pests
- Rotate containers with new seedlings for continuous supply
With good maintenance, one plant can yield 50–100 chillies per season!
Benefits of Growing Green Chillies at Home
- Organic and pesticide-free
- Fresh, flavorful harvest
- Easy to grow in limited space
- High nutritional value
- Economical and reduces grocery trips
- Satisfying gardening experience
Conclusion: Home-Grown Green Chillies—Spice Up Your Life
Growing green chillies at home is a simple, fun, and rewarding process. With proper seed selection, soil preparation, watering, feeding, pest control, and harvesting techniques, even beginners can enjoy fresh, fiery chillies straight from their garden or balcony.
Whether for cooking, pickling, or garnishing, your home-grown chillies will be fresher, healthier, and more flavorful than any store-bought variety.
Start planting today, and enjoy the joy of harvesting spicy, crunchy, and aromatic green chillies right at your doorstep!