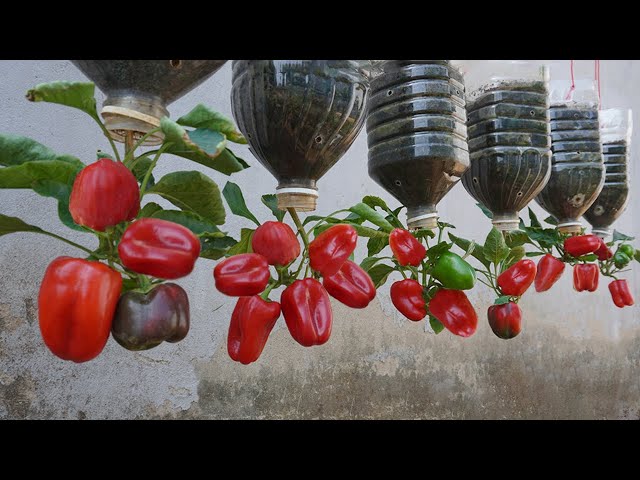
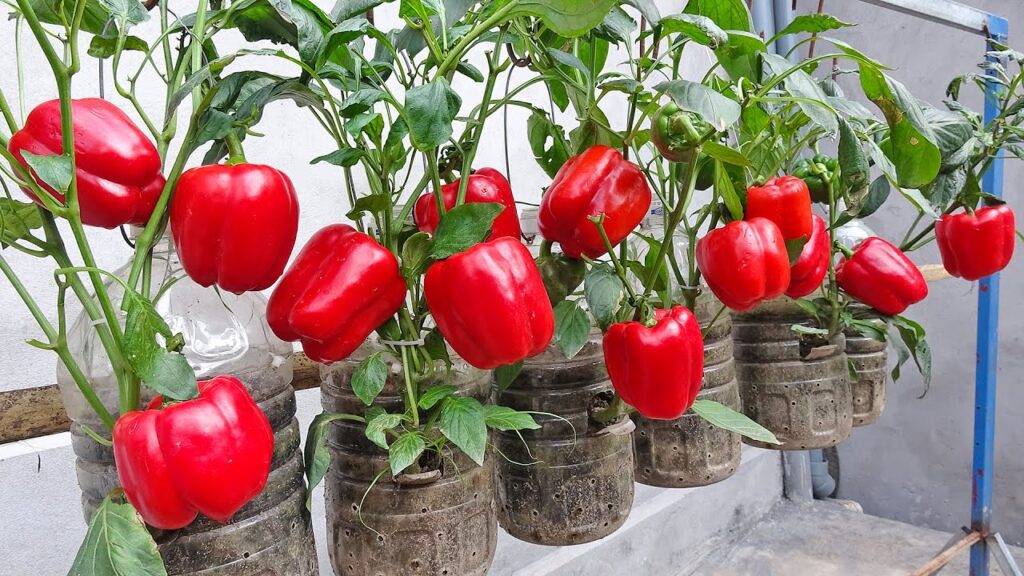
Bell peppers are one of the most versatile and nutritious vegetables you can grow at home. Sweet, colorful, and packed with vitamins, bell peppers are a favorite in salads, stir-fries, and even as snacks. But did you know you can grow bell peppers in recycled plastic bottles with incredible results?
This innovative gardening method is perfect for small spaces, urban homes, and eco-conscious gardeners. Using plastic bottles not only reduces waste but also provides a lightweight, portable growing container that produces surprisingly high yields. In this 1200-word guide, we’ll walk you through everything from selecting seeds to harvesting your first bell peppers using recycled plastic bottles.
Introduction: Why Grow Bell Peppers in Plastic Bottles?
Traditional bell pepper cultivation requires pots or garden beds. However, using plastic bottles has several advantages:
- Space-saving: Ideal for balconies, terraces, and small patios
- Eco-friendly: Recycles plastic waste
- Cost-effective: No need to buy expensive pots
- Portable: Move bottles to get optimal sunlight or protect from harsh weather
- High yield: Proper care ensures healthy, fruit-laden plants
This method is simple, effective, and surprisingly productive—even beginners can achieve excellent results.
Step 1: Selecting the Right Bell Pepper Variety
Choosing the right variety is crucial for success. Some common types for home gardening include:

- California Wonder: Classic, sweet, thick-walled peppers
- Yolo Wonder: High-yielding and disease-resistant
- Mini Bell: Small, colorful, perfect for containers
- Purple or Orange Varieties: Unique colors for aesthetic appeal
Select a variety suited to your climate and your culinary preference. Mini and dwarf varieties work best in plastic bottles due to limited root space.
Step 2: Preparing the Plastic Bottles
Materials Needed:
- 1–2 liter or larger plastic bottles
- Sharp knife or scissors
- Drill or nail for drainage holes
- Cocopeat, compost, or garden soil mix
Preparing the bottle:
- Cut the bottle about one-third from the top to create a planting container. The top part can be inverted and used as a mini greenhouse for seedlings.
- Poke 4–6 drainage holes at the bottom to prevent waterlogging.
- Optional: Paint or wrap the bottle with black tape to protect roots from sunlight.
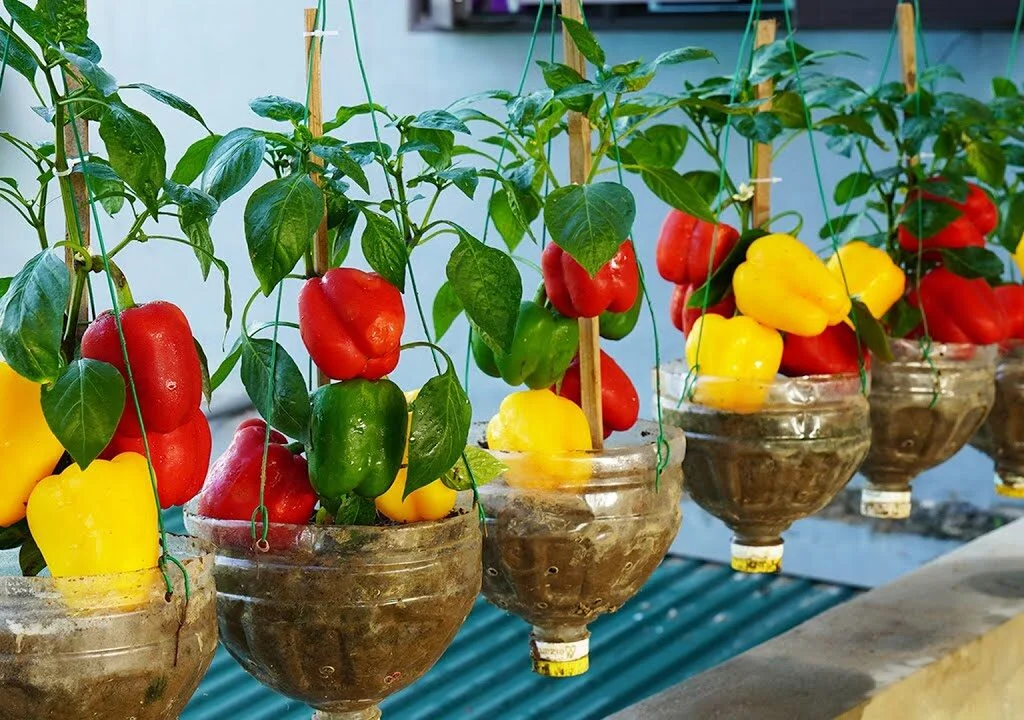
Plastic bottles create a lightweight, reusable, and easy-to-handle pot for bell peppers.
Step 3: Soil Mix for Bell Peppers
Bell peppers thrive in nutrient-rich, well-draining soil. A good soil mix for plastic bottles includes:
- 40% garden soil
- 30% compost or well-rotted manure
- 20% cocopeat or coco coir
- 10% sand or perlite for aeration
Optional booster: Add 1 teaspoon bone meal or organic fertilizer at planting to encourage strong root and fruit development.
Step 4: Sowing Seeds and Germination

Germination Steps:
- Soak bell pepper seeds in warm water for 4–6 hours.
- Plant seeds in small containers or directly in the top part of the bottle filled with seedling medium.
- Keep seeds warm and moist; ideal temperature is 24°C–30°C.
- Germination usually occurs within 7–14 days.
Once seedlings have 2–4 true leaves and are 3–4 inches tall, they are ready for transplanting into the main bottle.

Step 5: Transplanting Seedlings into Bottles
How to transplant:
- Fill the lower part of the bottle with prepared soil mix.
- Create a small hole in the soil.
- Gently transplant the seedling, ensuring the roots are covered and the stem remains upright.
- Water lightly to settle the soil around roots.
Tip: Only one plant per bottle is ideal to avoid overcrowding and ensure maximum nutrient absorption.
Step 6: Watering and Maintenance
Bell peppers in bottles require consistent moisture, but they do not like soggy soil.
Watering Guidelines:
- Water when the top 1–2 inches of soil is dry
- Deep, slow watering encourages strong root growth
- Reduce watering slightly during fruiting to improve flavor
- Mulch the soil surface with dry leaves or straw to retain moisture and reduce evaporation
Step 7: Sunlight and Temperature Requirements
Bell peppers need plenty of sunlight to grow and produce fruits.
- Sunlight: 6–8 hours of direct sunlight daily
- Temperature: 20°C–30°C is optimal
- In hot climates, protect plants from scorching afternoon sun by moving bottles to partial shade or indoors temporarily
Proper sunlight ensures vibrant leaves and sweet, crisp fruits.
Step 8: Fertilization and Nutrient Care
Fertilization is crucial for high yields in small containers.
Feeding Schedule:
- At planting: Mix compost and vermicompost into the soil
- Every 2 weeks: Use a balanced liquid fertilizer (NPK 10:10:10) or organic alternatives like fish emulsion
- During flowering and fruiting: Apply potassium-rich fertilizers (banana peel liquid or wood ash) to enhance fruit size and taste
Tip: Avoid excessive nitrogen—it leads to leafy growth with fewer fruits.
Step 9: Supporting Bell Pepper Plants
As bell peppers grow and produce fruits, they can become top-heavy.
Support Tips:
- Use bamboo sticks or small stakes
- Tie the main stem loosely with soft twine
- Prune lower leaves or weak branches to improve airflow and reduce pest attacks
Proper support ensures strong stems and healthy fruit production.
Step 10: Pest and Disease Management
Even in bottles, bell peppers can face pest challenges:
Common pests:
- Aphids
- Whiteflies
- Spider mites
Natural control methods:
- Neem oil spray every 7–10 days
- Garlic-chili spray to deter insects
- Remove damaged leaves promptly
Disease prevention: Keep the soil and containers clean, avoid waterlogging, and rotate plants to reduce fungal infections.
Step 11: Flowering and Fruit Setting
Bell peppers begin flowering 6–8 weeks after transplanting.
- Flowers appear in leaf axils
- Provide consistent nutrients and water
- Pollinate gently by shaking flowers or using a soft brush to transfer pollen (helps increase fruit set)
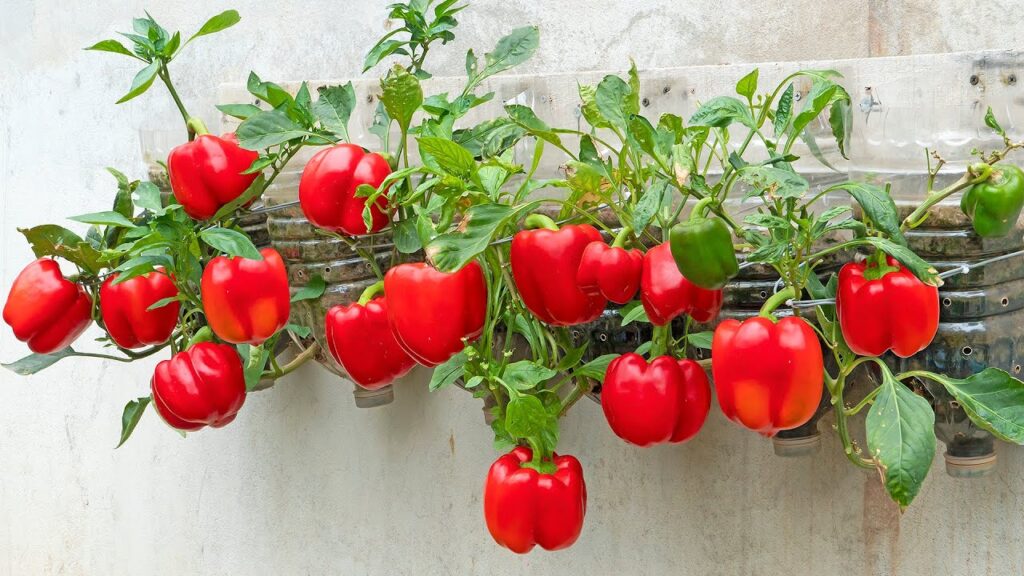
Bell peppers in bottles can produce multiple harvests over several months with proper care.
Step 12: Harvesting Bell Peppers
When to harvest:
- Green bell peppers: Pick when fully green, firm, and glossy
- Red, yellow, or orange varieties: Wait until they change color completely
How to harvest:
- Use scissors or garden shears to cut the fruit
- Avoid twisting or pulling, which can damage stems
- Regular harvesting encourages the plant to produce more fruits
Tip: One bottle can produce 4–8 peppers per harvest depending on the variety and care.
Step 13: Continuous Care and Replanting
Plastic bottle bell pepper plants can last for 6–8 months with proper care. After the plant stops producing:
- Remove old plants
- Refresh soil and compost
- Plant new seedlings for continuous supply
Reusing bottles saves money and supports sustainable gardening practices.
Benefits of Growing Bell Peppers in Bottles
- Space-efficient: Perfect for small homes
- Eco-friendly: Recycles plastic waste
- Easy to manage: Lightweight and portable
- High yield: Produces multiple harvests
- Fresh, chemical-free: Healthier than store-bought peppers
- Fun and educational: Ideal for teaching kids about gardening
Conclusion: Bell Peppers in Plastic Bottles—Easy, Fun, and Rewarding
Growing bell peppers in recycled plastic bottles is a creative, sustainable, and productive way to enjoy fresh vegetables at home. With simple tools, proper soil, consistent care, and smart planting techniques, you can produce lush plants with vibrant, juicy peppers even in limited spaces.
This gardening hack not only helps reduce plastic waste but also brings the satisfaction of harvesting your own healthy, flavorful vegetables. Start today, and turn your empty bottles into a mini bell pepper garden that will delight your kitchen and your taste buds!