When winter rolls around, it’s not just your wardrobe that deserves a frosty update — your nails do, too! Snowflake nails are one of the most magical trends of the season, combining shimmering whites, icy blues, and sparkling silvers to capture that snow-day aesthetic we all adore. Whether you’re gearing up for a cozy cabin getaway, hitting the slopes, or simply sipping cocoa by the fire, these seven snowflake nail designs will bring fresh, frosty vibes right to your fingertips.
Let’s explore the prettiest, trendiest, and most pin-worthy snowflake nail ideas to try this winter.
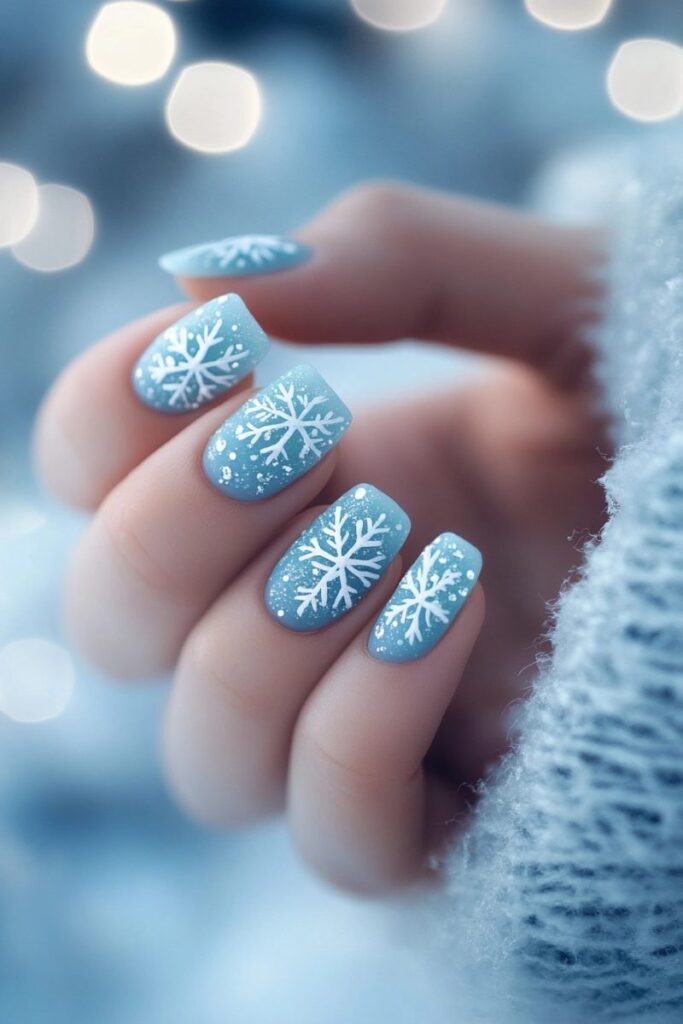
1. Icy Blue Snowflake Nails
There’s something instantly calming and elegant about icy blue nails. They bring to mind crisp winter mornings, soft snow, and that chill in the air that makes everything sparkle.
Start with a cool pastel or baby blue base coat. Once it’s dry, use a fine brush or snowflake stencil to paint delicate white snowflakes across a few accent nails. Add silver glitter polish to the tips or lightly across the nails for that frosted finish.
Pro Tip: Apply a high-shine top coat to make your manicure look glossy and ice-like — as if each nail were frozen in time.
Best For: Winter minimalists who love a polished, fresh look with a touch of magic.
Color Combo Inspiration: Baby blue, white, and shimmering silver.
2. White and Silver Snowflake French Tips
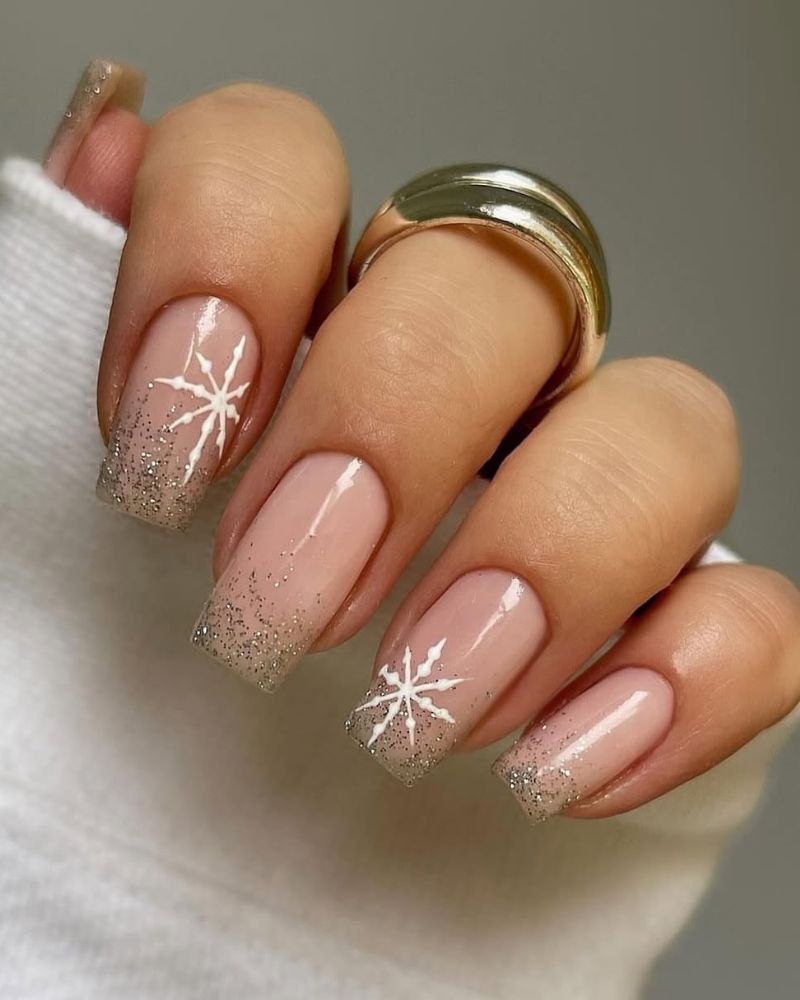
Upgrade your classic French manicure into something truly winter-worthy with white and silver snowflake tips.

Start with a nude or sheer base and replace the traditional white tip with a sparkly silver polish. Then, add small white snowflake decals or hand-drawn designs across the silver tips for a touch of holiday charm.
Styling Tip: For an extra-glam look, apply a single crystal rhinestone to the center of one or two snowflakes. This catches the light and gives your manicure a diamond-dusted effect.
Best For: Those who want an elegant winter nail look that pairs beautifully with everything from cozy sweaters to evening gowns.
Color Combo Inspiration: Nude, chrome silver, and crisp white.
3. Glitter Snowflake Ombre Nails
Nothing says “festive glam” quite like glitter ombre nails — and snowflakes make them even dreamier.
Start with a white or pale gray base, and then blend upward with a gradient of silver glitter polish to mimic falling snow. Add a few snowflake accents in white or light blue polish on your ring and middle fingers to complete the winter wonderland vibe.
Pro Tip: Try chunky holographic glitter for an extra twinkle that shines in every light.
Best For: Holiday parties, winter weddings, or anyone who loves a bold, sparkly mani that still feels classy.

Color Combo Inspiration: Silver, pearl white, and iridescent glitter.
4. Navy Blue Snowflake Nails with Rhinestone Accents
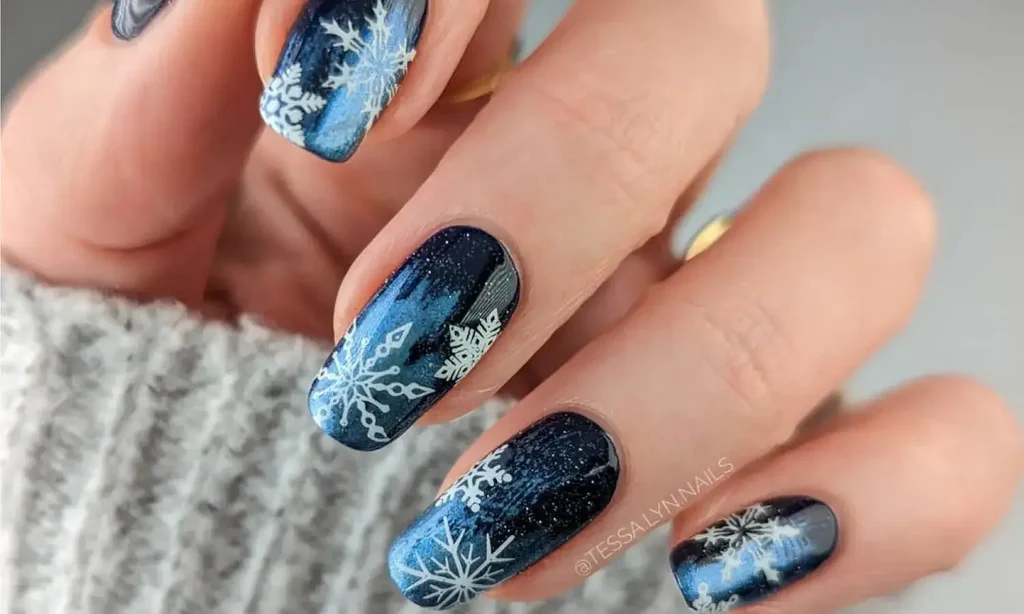
Want a mani that’s both moody and magical? Navy blue snowflake nails are a dramatic and modern take on the trend.
Apply a deep navy polish as your base and let it dry completely. Then, use a white or metallic silver polish to paint or stamp snowflake designs onto one or two accent nails. Add a few strategically placed rhinestones or micro pearls at the center of each flake for that extra bit of luxury.
Styling Tip: This look pairs perfectly with silver jewelry, a faux-fur coat, or a little black dress for any winter event.
Best For: Glam lovers who adore a striking, elegant manicure that stands out.
Color Combo Inspiration: Navy, silver, and crystal rhinestones.
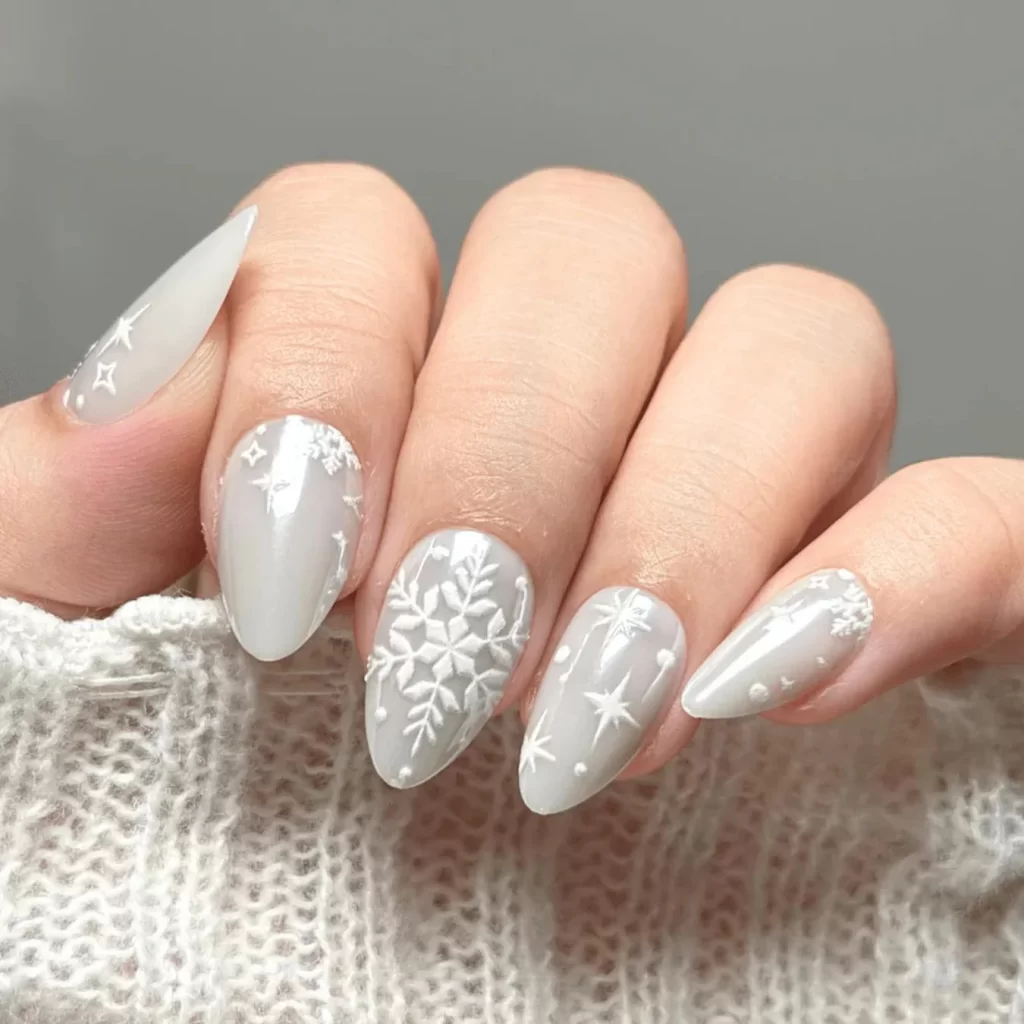
5. Frosted Glass Snowflake Nails
For a soft, ethereal vibe, frosted glass nails are the epitome of icy chic. This look mimics the delicate, misty texture of frozen glass — subtle yet stunning.
Use a sheer, milky polish or a matte top coat to achieve that translucent, frosty finish. Add white snowflake decals or freehand tiny flakes in fine detail across a few nails. If you want to enhance the texture, mix in a bit of iridescent powder or shimmer before sealing the design.

Pro Tip: Finish with a matte top coat for a velvety frost effect — or go glossy for that “ice cube” shine.
Best For: Anyone who loves understated, trendy nail art with a modern edge.
Color Combo Inspiration: Milky white, pearly shimmer, and soft silver.
6. Snowflake Nails with Gradient Blue Hues
Why settle for one shade of blue when you can have them all? Gradient snowflake nails blend multiple cool tones — from pale sky blue to deep sapphire — creating a gorgeous ombre effect that looks like a twilight snowstorm.
After painting the gradient base, add small white snowflake designs in varied sizes. To give your mani depth, paint some snowflakes faintly (as if they’re in the background) and others in crisp white.
Styling Tip: Add a sprinkle of fine glitter over your gradient before applying the top coat to mimic snow falling under moonlight.
Best For: Creative nail lovers who like bold, colorful winter looks.
Color Combo Inspiration: Ice blue, cobalt, navy, and white.

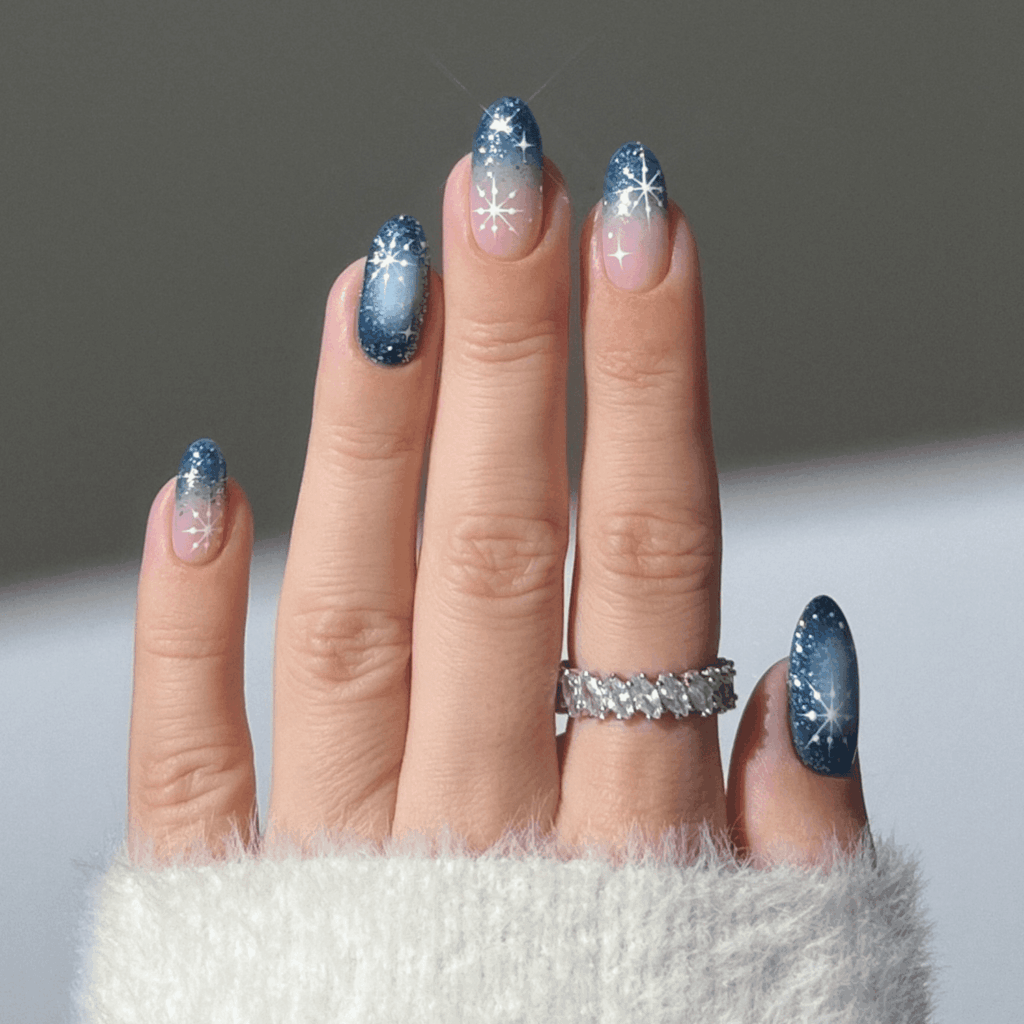
7. 3D Crystal Snowflake Nails
If you want to take your winter mani to the next level, 3D snowflake nails are pure showstoppers. Think of them as jewelry for your fingertips.
Start with a neutral or icy blue base, and then adorn your nails with small rhinestones, pearls, or metallic studs arranged in the shape of snowflakes. Mix textures — glossy polish, matte accents, and crystal embellishments — to create a multi-dimensional, luxe effect.
Pro Tip: Keep the rest of your accessories minimal so your nails can be the star of the show.
Best For: Fashion-forward nail enthusiasts and holiday party-goers who love bold, glamorous looks.
Color Combo Inspiration: Clear crystal, silver chrome, and baby blue.
Bonus: DIY Snowflake Nail Art for Beginners
If you’re new to nail art or prefer doing your manicure at home, snowflake nails are surprisingly easy to recreate.
Here’s a quick step-by-step guide:
- Start with a base color. Go for soft winter shades like white, silver, or blue.
- Use a thin detail brush or toothpick. Dip it into white polish and draw intersecting lines (like a star) for your snowflake base.
- Add details. Extend tiny “arms” off each line to create a delicate flake pattern.
- Sprinkle glitter polish or use a shimmer top coat to give your snowflake a frosty shine.
- Seal it in. Apply a quality top coat to prevent chipping and keep that icy glow lasting for days.
Optional: You can also use ready-made snowflake nail stickers or stamps — they save time and look perfectly polished!

How to Make Your Winter Mani Last Longer
No one wants their snowflakes to melt too soon! Here are a few simple tips to keep your winter nails looking flawless all season long:
- Hydrate your nails and cuticles. Cold air can dry them out fast — use cuticle oil daily.
- Always use a base coat. This protects your nails and helps color adhere better.
- Avoid soaking your nails in hot water. It can weaken polish and cause lifting.
- Apply a top coat every few days. It refreshes shine and seals in your snowflake art.
- Wear gloves when cleaning or washing dishes. It prevents your mani from chipping or dulling.
Final Thoughts: Let It Snow (on Your Nails)!
Snowflake nails are the perfect way to celebrate winter in style — playful, elegant, and endlessly customizable. From delicate white flakes to glittering 3D designs, there’s a snowflake look for every personality and occasion.
Whether you go to a professional salon or do it yourself, these 7 snowflake nail ideas will help your manicure feel frosty, fresh, and totally fabulous this season. So grab your favorite polishes, pour yourself a mug of cocoa, and let your creativity snowball — because your nails deserve to sparkle all winter long.